Heirloom Tomato Salad

One of the things that I love about my girlfriend is the way she inspires me. From a culinary standpoint, she provides me with endless ideas for dishes, ingredients to use and sometimes interesting flavor pairings, and always from a healthy standpoint. For the salad recipe here, the idea was to enjoy the simple, great flavor from the heirloom tomato. She picked up some black truffle Boshetto which was what originally sparked the idea. I’ve always enjoyed the flavor pairing of tomato and truffle, so I wanted to do something as simple as it could get, but in a way that highlights that flavor pairing.

Heirloom Tomato Salad

Heirloom tomatoes, cut into petals

Balsamic reduction

Lemon juice, small splash

Balsamic reduction

Boshetto cheese, thin slices

White truffle oil, drizzle

Kosher salt, to taste


I should also mention that photo credits have to go my girlfriend, she definitely has a better eye than me for this.

Mixed Bean Salad

I love simplicity in cooking & this salad fits that ideology. This was one of the dishes from a cooking class I did the other night and wanted to highlight the use of aromatic elements to bring out a ton of flavor. Using lots of herbs here, this dish is great as a summer salad.

If you are interested in cooking your own legumes, I am including instructions on how to do so. This can be something that can be thrown together using an assortment of canned beans, lots of great blends are available so you can definitely substitute your favorite blends. Only instruction I would include if using canned legumes: rinse them well to wash out the brine.

 As always, any feedback is welcomed as are your own variations to this idea!

Enjoy!

Marinated Garbanzo & Black Bean Salad

On cooking legumes:

  1. Soak legumes with water over night. Add water as needed.
  2. Rinse legumes.
  3. Place in a pot and add new water (enough to cover fully) along with mirepoix (onions, celery, carrots) cut into large pieces so they can be removed after cooking, also add a head of garlic cut in half, bay leaves, and thyme sprigs. You can substitute the water with chicken or vegetable stock, and you can also add smoked bacon with the mirepoix for extra flavor.
  4. Bring to a boil and reduce temperature to a simmer. Cooking times will vary depending on the legume used, and you’ll need to keep an eye on the liquid level in case you need to add more.
  5. When legumes are done cooking, strain remaining liquid and remove mirepoix, garlic and herbs.
  6. Spread over a wide baking sheet or container to cool down.
  7. Once cooled, you can place in zip log bags to freeze or use immediately.

For the salad:

Garbanzo beans                     1 cup

Red Kidney Beans                   1 cup

Yellow lentils                          1 cup

Red onion, small dice             ¼ cup

Avocado, diced                      ½ cup

Roma tomato, small dice        ¼ cup

Parsley, chopped                    to taste

Cilantro, chopped                   to taste

Fresh thyme, chopped             to taste

Lemon juice                           1

Raspberry vinegar                  to taste

Extra virgin olive oil               ¼ cup

Kosher salt                            to taste

Black pepper                          to taste

Directions:

  1. In a large bowl, combine all ingredients and toss together.
  2. Adjust seasoning as needed.
  3. Place in the fridge until ready to serve.

* can be held in the cooler for up to 5 days.

Date Night!

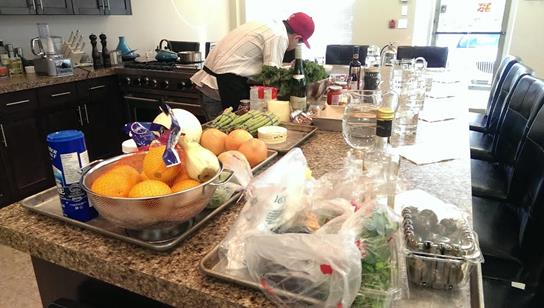
What a fun night! Every so often I get to teach cooking classes at the Compleat Cook. Friday night’s class was a hand’s on Date Night focusing on Spanish Cuisine with a 7 course tasting menu. The three recipes I’m showcasing here were three of the dishes that I have been wanting to try for a while and happy to see people enjoy. I also have to give a shout out to my assistant for the night, John Leung, who was one of four people representing Calgary in Master Chef Canada.

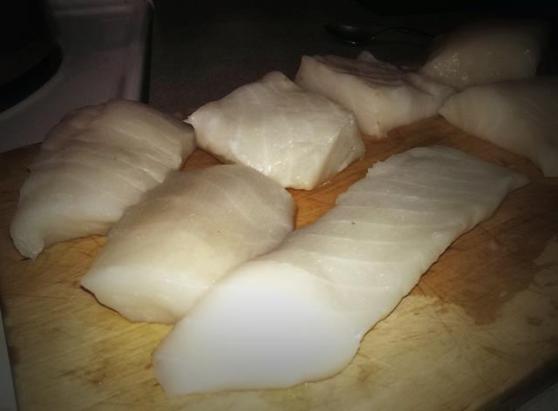
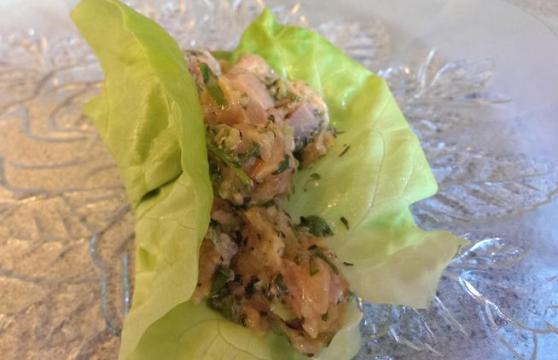
The first, Scallop Ceviche with a Mango Gastrique, lots of textures and a nice balance between tart & sweetness. I was able to find some delicious, wild caught Scallops from New England. A fantastic Scallop found at Orca Bay Fish Co. in the Kingsland Farmer’s Market in Calgary. The recipe here calls for julienned Roma tomatoes. While doing the shopping for the class at the farmer’s market, I was able to find this little tiger striped organic tomato that tasted great and had a cool look to it.


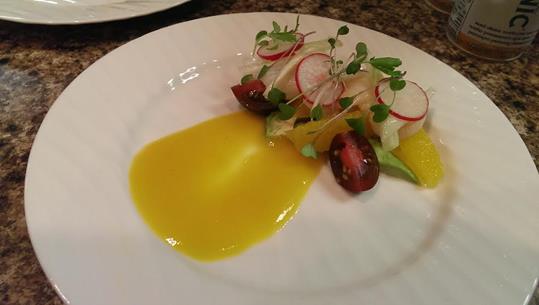
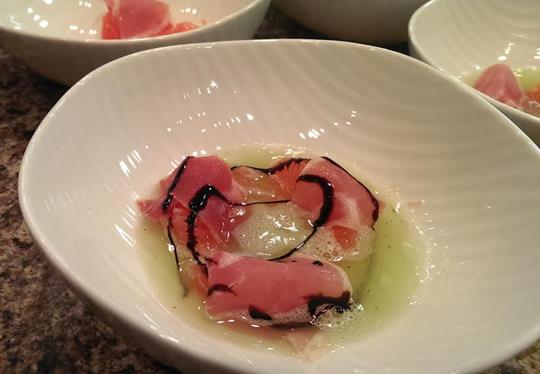
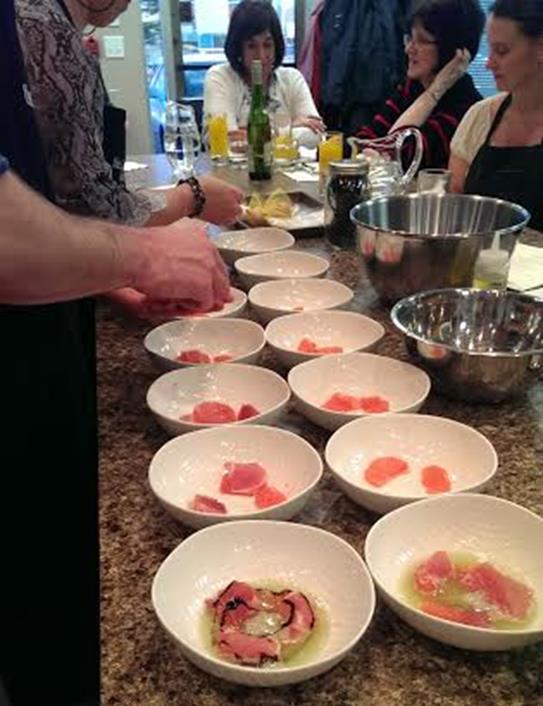
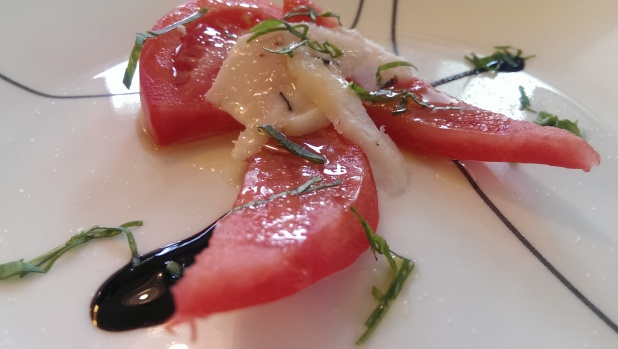
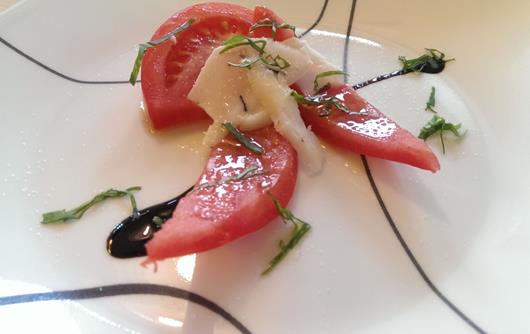
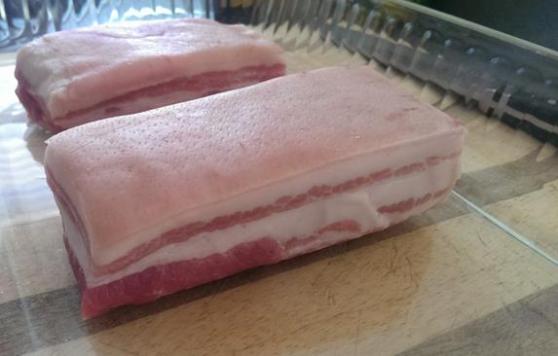
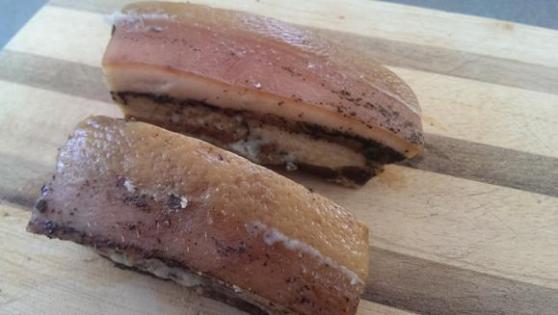
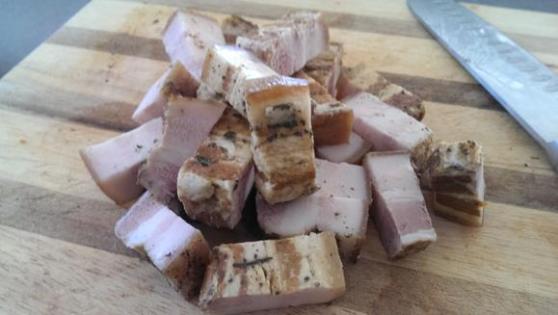
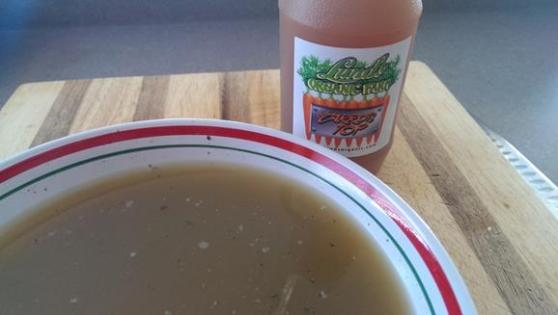
The Honey Dew Soup with Grapefruit & Prosciutto was a 2 source inspiration from Spain. While ideally, I would have preferred to make this dish with Jamon Iberico, a fantastic product made from black Iberian pigs, but was unable to find some for this class. Prosciutto is definitely a great product in its own right and a fantastic pairing with honeydew. While I was in Madrid, I visited a restaurant called Museo Del Jamon, the ham museum where the starter course I had there was a slice of honeydew draped with thinly sliced Jamon Iberico. It was very simple & rustic but a great, classic flavor pairing. The next source of inspiration came from a Ferran Adria cookbook called La Comida de la Familia, the family cookbook in which they detail the family meals had at El Bulli with the entire team before their dinner service. Many great recipes collected in this book, one of which was a honeydew soup with grapefruit segments. I didn’t go too far away from the recipe because the recipe is simple and great because of it. The only changes I added to this were the Prosciutto and the Balsamic reduction because these are flavors that are very natural together. The one piece of instruction I will add here that is not in the recipe directions is to squeeze the juice from the grapefruit as you segment them, and incorporate them with the honeydew juice.


At the Museo Del Jamon!


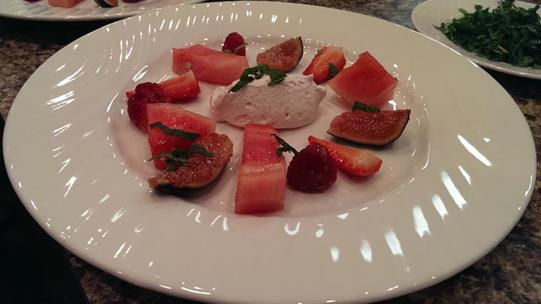
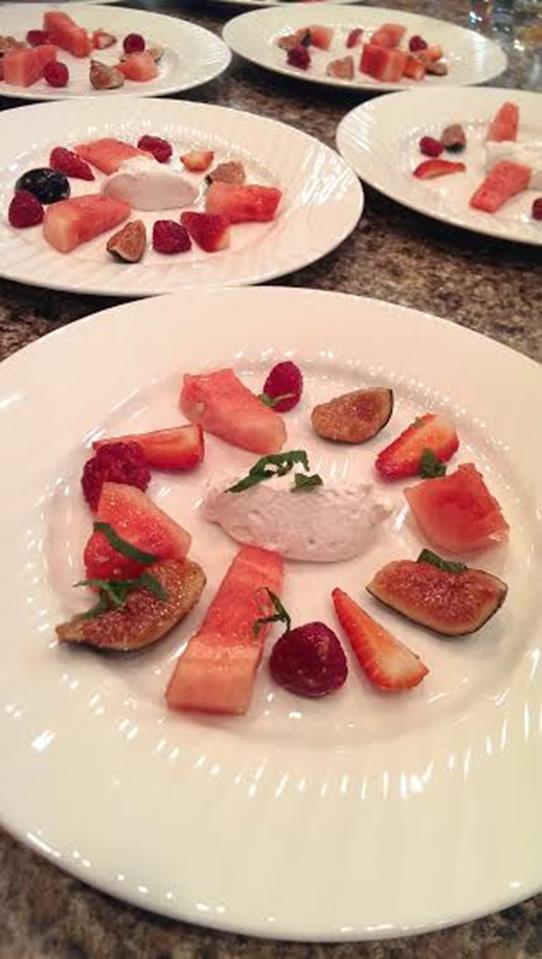
The third recipe here, Variations of Red, was our final dish from the night & was another idea I got from a dish made at El Bulli. The idea of the ingredients came from their dish, in which they used a freeze drying process for their fruits & a light strawberry foam. To simplify the recipe, I marinade the fruit in a balsamic syrup and sub the strawberry foam with a strawberry & vanilla bean whipped cream. This was a nice, simple & light dessert that to me is a great finish to a date night dinner.


If you’re interested in finding out more about the cooking classes hosted by the Compleat Cook please visit their website. I have a few more classes coming up soon, Cooking 101, Small Bites, Chocolate & Saucery! There is also a great lineup of Calgary Chef’s being featured until the end of June, including my friend Andrew Trinier who was one of the best Chef’s I have worked with so far in my career. Please contact Margaret for more info!

Scallop Ceviche
For the marination:
Digby scallops, cut into three equal medallions
Lime juice
Lemon juice
Orange juice
Fennel, julienned
Extra virgin olive oil
pinch Kosher salt
Directions:
1. In a glass bowl, combine all ingredients.
2. Marinade for 30 minutes.
3. Drain scallops, reserve liquid & fennel separately.
4. Pat the scallops dry, cover and place in the fridge until ready to use.
For the garnishes:
Roma tomatoes, julienned
Avocado slices
Julienned fennel
Radish, thinly sliced medallions (held in ice cold water)
Blood orange segments
Mango gastrique (recipe follows)
Micro-greens, freshly cut
to finish Malden salt
to finish Freshly cracked black pepper
For the mango gastrique:
Marinating liquid
Granulated sugar
Rice vinegar
Honey
Ripe mango, diced
Kosher salt
Ground black pepper
Directions:
1. Add marinating liquid to a pot & bring to the boil.
2. Add remaining ingredients & bring to the boil.
3. Reduce liquid by half.
4. Blitz to a smooth consistency with a blender.
5. Adjust seasoning as needed.
Honeydew Soup w/Grapefruit Segments & Prosciutto
1 Honeydew, peeled, cored & cut into small squares
small bunch Mint
100ml Water
Pinch granulated sugar
1 Grapefruit, peeled, segments
100g Prosiutto
Drizzle Balsamic reduction
Directions:
1. Place honeydew & mint in a blender & blitz until smooth.
2. Pass through a strainer to smooth out consistency.
3. Wrap grapefruit segments with prosciutto & arrange in a bowl.
4. Pour strained soup over the segments, only enough to cover approximately half way.
5. Drizzle with balsamic reduction.
Variations of Red
For the Balsamic Syrup:
1 cup Granulated sugar
1 cup Water
1/2 cup Balsamic vinegar
Directions:
1. In a medium sized pot, bring the granulated sugar & water to a boil.
2. Continue boiling until sugar is completely dissolved.
3. Add the balsamic vinegar. Check for a balance between sweet & sour and adjust to taste.
4. Place syrup in the fridge to cool down.
To marinade:
1/2 lb Watermelon, small cubes
1/2 lb Strawberries, quartered
1/2 lb Raspberries, whole
1/2 lb Figs, halved
2.5 cups Balsamic syrup
Directions:
1. Place all the fruit in a glass bowl and cover with the syrup.
2. Marinade in the fridge for approximately 1/2 hour to 1 hour.
For the Strawberry & vanilla whipped cream:
1/4 cup Strawberries, juiced
3 pods Fresh vanilla
1 tsp Sugar
1 cup Heavy cream

If you have any questions or comments about any of the recipes presented here, please feel free to drop me a line or comment!


Great way to spend a day off!!!


Had an awesome opportunity yesterday to spend time watching two great documentaries. Ell Bulli: Cooking in Progress & Jiro Dreams of Sushi. Two opposite approaches to food but both masterful in their results.

In El Bulli: Cooking in Progress we get to see into the creative process of the El Bulli team. While the restaurant was still operational, El Bulli used to close for 6 months out of the year, during which, the creative team moved to their test kitchen/laboratory in Barcelona to experiment with new ingredients & develop the techniques & the ideas that would form the new season’s menu. This documentary is a great look into a year at El Bulli. We get to see as the Chef’s test, taste & document their failures & successes equally. If you are looking for a documentary about the minds of the people behind El Bulli, this is not it. There are no interviews or history given about the restaurant or Ferran Adria. This documentary is nothing more than a fly on the wall of the former best restaurant in the world. For me, watching the process in this manner is more than enough. It’s definitely simple, but the food produced is far from. This is a great documentary for any foodie or simply anyone wanting to see avant-garde cuisine in its highest form.

Jiro Dreams of sushi is about the Chef/Owner of Sukiyabashi Jiro, a 3 Michelin Star, 10 seat restaurant tucked away in a basement, next to the Ginza Metro Station. At 86 years old, Jiro Ono is the oldest recipient of the highest award given by Michelin. Did I mention that Jiro is 86 years old? It is amazing that at his age, this Sushi Master still has the passion to continually perfect his craft. In this documentary, we get see into the mind of Jiro, his story & the love for his life’s work. His dedication extends even to the simplicity of serving, watching people eat, seeing if his diners are right or left handed to determine where to place the sushi on the plate. His technique extends to even having the apprentices massage octopus for up to 40 minutes in order to achieve a tender texture once cooked. As much as this documentary is about sushi, at the heart it is about family & Japanese culture, work, dedication, passion & eccentricities. This was a great documentary and would definitely recommend to anyone out there with a passion for food.

This was a perfect way to spend a day off, a great way to see the dedication of two masters. I would love to hear your thoughts on these documentaries if you have seen them, or even to recommend more documentaries about food and Chef’s worth watching.

Brussels Sprout Caesar Salad w/Pork Belly croutons

While visiting Vancouver last summer, my girlfriend and I had the chance to eat at a great restaurant called The Flying Pig in Gastown. Hot summer day, patio seats, wine, beer & lots of great food. Gratin brussels sprouts & Caesar salad with pork belly croutons were the two dishes that stood out the most to us and has lead me into this recipe here.

The key to this recipe is to braise the pork belly the day before and allowing it to cool in the braising liquid overnight. Also, be careful when pan frying. This is a fatty piece and will crackle, spraying oil everywhere, so if possible, use a cover if you have one. The result is worth it.

Brussels Sprout Caesar Salad w/Pork Belly Croutons
For the pork belly croutons: set oven to 350f
1.2 lbs Pork belly, halved
1/2 White onion, large dice
3 Celery stalks, large dice
4 Garlic cloves
1 bunch Fresh thyme sprigs
1 tbsp Dried oregano
1.5 cup Chicken stock
1 cup Pineapple juice
Directions:
1. Cover braising pan with tin foil. Place in the oven and braise until pork belly is tender.
Approx. 2.5 – 3 hrs.
2. Allow to cool down before placing in the oven overnight.
3. The next day, remove the pork belly from the braising liquid. Remove any fat that accumulates
on top of the braising liquid. Strain out remaining ingredients and reserve the braising liquid
for use in cooking the brussel sprouts.
4. Cut the pork belly into large crouton sized pieces.
5. Using a little bit of vegetable oil, pan fry the pork belly pieces until completely browned on all
sides.
6. Remove croutons from the pan and place in a bowl, toss with salt & pepper and place on a
plate lined with paper towel to soak up extra grease.
For the brussels sprouts: set broiler to 385f
2 lbs Brussels sprouts, bottoms trimmed and halved
1 cup Apple juice
1 cup Pork belly braising liquid
pinch Kosher salt
light drizzle Extra virgin olive oil
Directions:
1. Place brussels sprouts in a pan & cover with apple juice and braising liquid.
2. Bring to a gentle simmer, and cook until brussel sprouts are beginning to get soft.
3. Remove sprouts from liquid, place in a bowl & toss with kosher salt & olive oil.
4. Place sprouts on a baking sheet lined with parchment paper, place in the oven & cook for
approx. 8 – 10 minutes, until sprouts are beginning to brown.
For the avocado caesar dressing:
A 1 Egg yolk
1 tbsp Grainy dijon
1 tbsp Anchovy, minced
1 small Avocado
50 ml White balsamic vinegar
B 150 ml Grapeseed oil
C splash Worcestershire shire
splash Tabasco sauce
to taste Kosher salt
to taste Cracked black pepper
Directions:
1. Place all A ingredients and food processor and blitz to form a smooth, paste like consistency.
2. While blitzing, pour in grapeseed oil in a slow steady stream until dressing emulsifies and
flavors become balance.
4. Adjust seasoning with all C ingredients.

Braised Pork Belly w/Porcini Mushrooms & Agrodolce Sauce

I love pork. Anyone who knows me has probably heard me talk about my addiction once or twice, so to be working with pork belly got me excited enough to prepare it two different ways. With recipe 1 here, I wanted to do two things. The first was to use one of my favorite flavor profiles, agridulce, sweet & sour, to highlight the versatility that pork provides. The second was to use one of my favorite cooking methods in braising. This method to me is a fantastic way to develop rich flavors using cheaper cuts of meat. It’s rustic & simple.

Agrodolce is a traditional Italian sweet & sour sauce, similar to a gastrique, with additional flavourings added. In this recipe, I wanted to use a similar method with some Spanish notes. Sherry wine, sweet smoked paprika & garlic. The porcini mushrooms provide a nice earthiness to this dish.


If you’re unfamiliar to braising, here are some basic procedures. Brown your protein to caramelize and develop flavors, also known as the Maillard Reaction. Remove proteins from your pot or pan and sweat off your vegetables or mirepoix. Deglaze with a wine or in this case, a combination of wine and vinegar. Add your desired stock and other liquids. Return the proteins to the liquid, cover and cook in the oven. Cooking times will vary depending on the type of protein used, the size of the cut and the temperature. When looking at any recipe with a braising process and times indicated, always remember that those times are basic guidelines and you should always interpret them as such. Cook your proteins as long as they need to become tender.

Braised Pork Belly w/Porcini Mushrooms & Agridulce Sauce
For the braise:
1.06lbs Pork belly, cut into large squares
4 tbsp Vegetable oil
2 tbsp Butter
half White onion, large dice
4 Celery stalks, large dice
.9 oz Dried porcini mushrooms
5 Garlic cloves, crushed
1 tbsp Sweet paprika
1/2 cup Sherry wine
1/4 cup Red wine vinegar
1/4 cup Pineapple juice
1 tbsp Brown sugar
2 cups Chicken stock
1 bunch Fresh thyme sprigs
4 Bay leaves
2 tbsp Capers, chopped
Directions: (set oven @ 350f)
1. Using medium heat, sear & brown all sides of the pork belly pieces. Remove pieces from the pan
once completely browned and set aside.
2. Some fat will render out from the pork belly, but depending on the piece you get, you might need
the little bit of extra fat to cook the veg. If so, use the bit of extra butter.
3. Add the onions and caramelize. Medium low heat, and take the time to develop the color and
flavor of the onions.
4. Add the celery and sweat until it becomes soft.
5. Add the dried porcini mushrooms, garlic & sweat out for approx. 2 minutes.
6. Add sweet paprika and blend the spice well the veggies.
7. Deglaze pan with Sherry wine, red wine vinegar & pineapple juice.
8. Add the brown sugar, and bring liquid to a boil. S
9. Add the chicken stock, and again, bring liquid to a boil.
10. Return the pork belly pieces into the braising liquid, add thyme sprigs & bay leaves.
11. Cover pan and place in the oven, braise for approx. 2.5 hours, or as long as it takes for pork
belly to become tender.
12. Remove pork belly pieces & porcini mushrooms from the braising liquid, strain out veg.
13. Place braising liquid into a pot, set heat to medium high and bring to the boil.
14. Reduce braising liquid by 1/3, or until it becomes thick enough to cover the back of a spoon.
15. Serve pork belly pieces on their own with pieces of the porcini mushrooms & drizzle with sauce
as a tapa dish.

And for the end result!

With recipe 2, which I will only mention quickly here and post within the next couple of days, I will be preparing a Brussel Sprout Caesar Salad with Pork Belly Croutons. For the time being, I hope you enjoy this one.


St Patrick’s Day Waffles…without Artificial Coloring!

Artificially colored beer will soon be flowing everywhere, and what better way to start that day off than with some not artificially colored waffles?! I will not try to pretend in any way shape or form that this recipe is healthy, its waffles, sugar and syrup. The process of extracting chlorophyll though is something that makes a great substitute to artificial food coloring and can be used in a variety of ways.

I recently stumbled upon a blog called Birdworms & Buttermilk where the writer describes a very simple method of achieving this extraction. All you need for this is spinach, water, a good fine mesh strainer, and patience. When I made my first attempt at extracting chlorophyll a few years ago, I lacked the patience, rushed the process and ended up with a failed attempt.

St Patrick’s Day Waffles
2 cups All-purpose flour
3 tbsp Granulated sugar
4 tsp Baking powder
1/4 tsp Salt
1.5 cups Buttermilk
1 tsp Vanilla extract
2 Large eggs
1/2 cup Butter (melted)
1 tbsp Chlorophyll extract
Directions:
1. Scale out ingredients, keeping dry and wet ingredients separate.
2. Sift all dry ingredients. Whisk wet ingredients.
3. Combine wet & dry ingredients, making sure that it’s a smooth batter.
4. Allow for the batter to rest for at least 20-30 minutes before using.
5. Depending on the size of your waffle iron, use 4 – 6 fluid ounces per waffle.

For the chlorophyll extraction:

½ lb spinach leaves

2 cups of cold water

Place the spinach leaves and the water in a food processor and blitz into a paste consistency.

Place this into a strainer set over a pot. Using rubber gloves press the spinach paste to extract as much green juice from this as possible. Double strain this juice to ensure that no spinach pulp is left over. (While I do not do any gardening, for those of you that do, the remaining pulp can be used for composting)

Place the pot with the green juice on the stove under low heat. This process will take a bit of time so this is where patience will be needed. You don’t need to stir, and be careful that the juice doesn’t come to a boil. What we are looking for here is for the chlorophyll to separate from the water.

As you can see in this picture, the chlorophyll is separating from the water. I took this a little further and continued to cook it until the water barely had any traces of green and the chlorophyll had sunk to the bottom. We are looking for that clear separation before we move onto the next step, and remember to be patient for this to happen.

Strain through a fine mesh strainer. If you don’t have a fine mesh strainer, line your strainer with a coffee filter.

The end result is this deep green paste, almost resembling oil paint.

I hope you find this helpful, and if you have any comments or questions, please leave a response!

Skuna Bay Salmon Tartare Lettuce Wraps


I have wanted to work with this salmon for some time now. A sashimi grade, ocean raised salmon from Skuna Bay in Vancouver Island. While it was my idea to pick up the salmon and my execution, this dish is my girlfriend’s brainchild. With limited ingredient options and her free flowing ideas, we came up with these awesome little lettuce wraps.

Just a little bit about why I have wanted to work with this particular salmon. A while back I watched a Tedtalk by Dan Barber called “How I fell in love with a fish”. http://www.ted.com/talks/dan_barber_how_i_fell_in_love_with_a_fish Needless to say I found this topic inspiring because we rarely think about the food we are eating and even less about what is being fed to the animals we consume. It is crazy to think that a lot of farmed fish are being fed sustainable proteins, which is a combination of corn, algae, fishmeal & chicken pellets. Of course, each fish farm uses their own combination of fish feed. In this talk, Dan Barber talks about a farm in Spain that uses revolutionary fish farming methods. Ocean water farming with fish that feed on natural aqua culture. It’s such a simple concept but one that is rarely utilized or appreciated.

Ever since watching this I have been searching for a place in Canada that utilizes similar methods. Now, while the farm that Dan describes in his talk is perhaps difficult to duplicate due to ecological and geographical conditions, at Skuna Bay they are applying a similar ideology. Ocean raised salmon that feeds in its natural habitat, taking 3-4 years to harvest and carefully selected and inspected at the time of ordering. That kind of care is rare to find & I can assure that as a consumer, there is a very noticeable difference to the more commonly farmed fish. The Skuna Bay salmon is buttery, tender, mild, meaty & most importantly, fresh. If where ever you are, you can find a similar product; I highly recommend that you indulge. Apart from the obvious benefits of eating fish that is raised and fed naturally, the taste & mouth feel is simply incomparable to the other option.

Skuna Bay Salmon Tartare Lettuce Wraps
2lbs Salmon filet, skinned, small diced
1tbsp Shallots, brunoise
1tbsp Cilantro, chopped
1/4 cup Hemp hearts
1.5 tbsp Sesame oil
2 tbsp Olive oil
2 tsp Fresh lemon juice
1 tbsp Mint sauce
1 tbsp Horseradish
to taste Kosher salt
to taste Ground black pepper
1 head Butterleaf lettuce, leaves trimmed & washed
Directions:
1. Carefully skin the salmon & cut into a small dice.
2. Place all ingredients in a bowl and mix together.
3. Adjust seasoning to taste.
*Notes: Both the horseradish & mint sauce used in this recipe have an acidic profile.
The measurements used are merely a suggestion. Keeping in mind that the flavour
of the salmon is meant to be highlighted, only use enough to help balance the
overall taste without over powering the end result.
If unsure, take a small amount of the salmon tartare mix without both of these ingredients
and place in a separate bowl. Add a small amount of each of these ingredients to see what is preferable to your own palate.

I hope you enjoy this recipe. If the type of salmon described here is not available to you, you can definitely try this with any high quality salmon you can get your hands on.

Chilean Sea Bass & Mussels in a Tomato Broth

I was lucky enough this week to get my hands on some fantastic Ocean Wise Chilean Sea Bass. If you live in Canada, I’m sure you have seen this symbol next the seafood offerings on a lot of menus. Created by the Vancouver Aquarium, Ocean Wise is a program designed to educate about the problems surrounding sustainable seafood. For more information, please visit http://www.oceanwise.ca/about/sustainable-seafood. Over fishing & environmental destruction are such a massive problem that for me, it’s easy to get behind any type of program that promotes environmentally responsible practices. Even in a landlocked city such as Calgary, Ocean Wise products are becoming more readily available for consumers. You can visit Orca Fish Company at the Kingsland Farmer’s Market in Calgary to find a lot of Ocean Wise seafood.

The recipe I’m showing here today is in my opinion, a simple yet delicious option to complement the subtle taste of this fantastic fish. It’s a great vehicle for preparing any seafood in a quick and easy way that highlights the value of simplicity. You can make this with any combination you like, keeping in mind that it is prepared as a seafood stew and you should choose fish that is firm and will withstand the cooking method. Halibut, catfish & cod are great options. Also, if choosing to add more types of seafood, add them in stages according to what will need a longer cooking time to the shortest time needed, ie. Mussels only need to open fully and should be added last. For more detailed information please feel free to drop me a line.

Chilean Sea Bass & Mussels in a Tomato Broth
For the tomato broth:
2 tbsp Vegetable oil
1/2 Onions, small diced
3 Celery stalk, small diced
1/2 Small fennel bulb, small diced
3 Garlic cloves, minced
2 tbsp Fresh thyme, chopped
1/2 cup White wine (drinking quality)
1/2 cup Fish stock (substitute with vegetable stock)
2 cups Diced tomatoes, canned
to taste Kosher salt
to taste Black pepper
1.5 lbs Chilean sea bass, cut into large pieces
1lb Mussels, washed & de-bearded
to taste Cilantro, chopped
Directions:
1. Heat up the vegetable oil on medium heat.
2. Add the onion, celery & fennel. Sweat veg. until soft.
3. add garlic & thyme. Cook until aromatic.
4. Deglaze with wine & reduce wine by half.
5. Add the fish stock & bring to the boil. Reduce by half.
6. Add the diced tomatoes. When broth comes to the boil, reduce heat to gentle simmer.
7. Adjust seasoning as needed.
8. Add the sea bass pieces into the broth. Simmer gently until the fish starts to become firm.
9. Add the mussels, cover with a lid, and cook until the mussels open up fully.
10. Finish with freshly chopped cilantro to serve.
*Optional: add small diced jalapeños when sweating the veggies for a touch of heat.

Mushroom Risotto

Part of the reason I wanted to start collecting recipes on a blog was to have a place to direct my family & friends when they ask for recipes for dishes I’ve prepared for them. Example, my older sister is constantly asking for my mushroom risotto recipe. I’ve prepared the dish for my family many times, never actually documenting the recipe. Gone through many variations but this combo here has been one of my favorite results. The dried porcini mushrooms provide a great intense flavor, and the combination of the Portobello, Crimini & the Oyster mushrooms give this dish a nice variation of texture and flavor.

Making risotto isn’t as complicated as a lot might think. Basic principles to keep in mind are to keep the stock warm, and to add the stock in small increments until the rice gets an al dente consistency. Keep your heat low and only stir occasionally to ensure that the rice doesn’t stick to the bottom of the pan.

Mushroom Risotto
1/4 cup Butter
1 cup Arborio rice
1/4 cup Shallots, brunoise
1/2 cup White wine
1/4 cup Dried porcini mushrooms
1 tbsp Freshly chopped thyme
2.5 cups Chicken stock, warm
1/2 cup Crimini mushrooms, sliced
1/2 cup Portobello mushrooms, sliced
1/2 cup Oyster mushrooms, sliced
to taste Kosher salt
to taste Black pepper
to taste Italian parsley, chiffonade
to taste Manchego cheese, shaved
1. In a small pot, heat up the chicken stock to gentle
simmer.
2. In a deep skillet, heat up the butter in medium low heat.
3. Add the arborio rice and cook on low heat.
4. Stir, and being careful not to brown the rice, cook
until grains begin to get a little translucent.
5. Add the shallots and cook until they begin to get soft.
6. Deglaze the skillet with the white wine.
7. Add the dried porcini mushrooms and the chopped thyme.
8. In small increments, begin to add the chicken stock.
Enough to cover the rice, stir occassionally.
9. Add the remaining mushrooms.
10. Continue addding the stock in small increments until the
rice is al dente.
11. Adjust seasoning.
12. Finish with the manchego cheese, shaved by using a
peeler, and the chiffonade of Italian parsley.

Please feel free to comment on the recipes and to share your own variations. One recipe that I am working on and will be posting soon as part of my tapas series will be a chorizo & prawn risotto. Enjoy!!!